Sokoban Strategy: 12 Tips to Solve Box-Pushing Puzzles
Good Sokoban strategy is less about moving quickly and more about protecting the future shape of the board. Before you push, identify dead squares, decide which goal must be filled last, and keep a route open for the player. These twelve tips explain how to solve Sokoban puzzles with fewer deadlocks, fewer restarts, and a clearer plan.
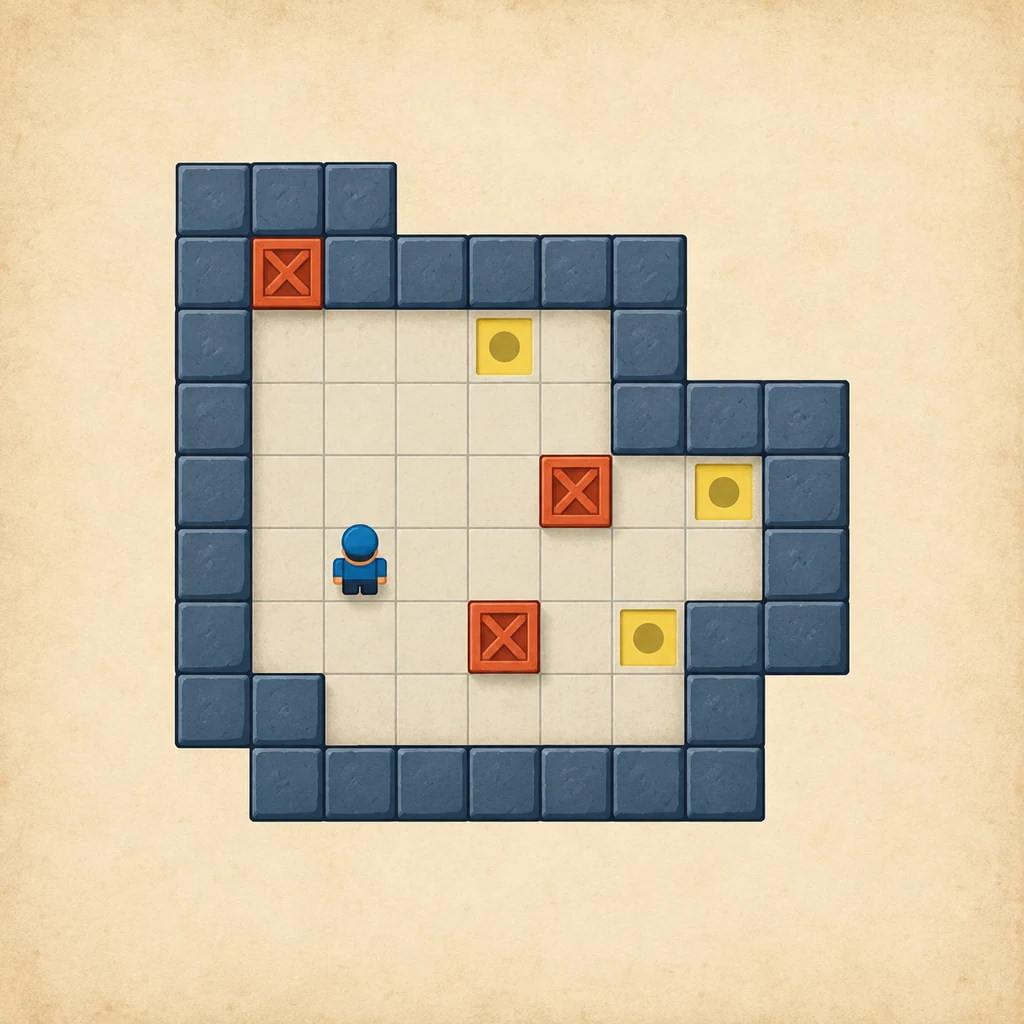
A useful plan protects open floor and player access before committing a box to a goal.
The quick Sokoban strategy
Sokoban is a push-only puzzle: the player can walk freely, but a box moves only when the player stands on the correct side and pushes it into an empty square. Walking is usually reversible; pushing often is not.
For a new board, locate goals, mark dead squares, inspect each goal’s approach, choose box order, and only then push. If a move closes the only route behind a box, test the next few pushes mentally first.
1. Read the board before pushing
Start by separating the board into walls, walkable floor, goals, and commitment zones such as corners, one-tile corridors, and narrow goal lanes. Then identify where the player can walk without moving a box. A proposed push is available only if the player can reach the required side.
Look for dependencies. A nearby box may need to move because the player cannot get behind it, while a blocking box may open the only route to another area. This prevents the nearest-object mistake.
12 practical Sokoban strategy tips
2. Mark dead squares before moving a box
The obvious dead square is a non-goal corner: once a box enters it, no horizontal or vertical push can remove it. Less obvious dead squares sit against a wall, beside a second wall, or in a short lane that has no goal at its far end. Before the first push, mentally mark these spaces as forbidden destinations.
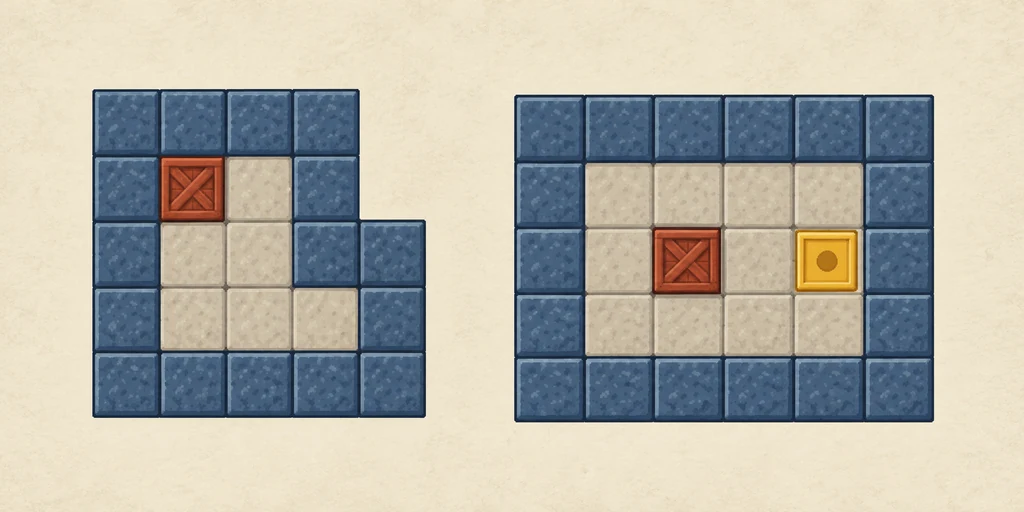
A corner is safe only when it is also a goal. Open workspace gives the player more ways to change sides.
Deadlocks are broader than corners: boxes can freeze along a wall, block the player’s route, or seal a corridor needed later. If the board feels smaller after a push, reassess before continuing.
3. Plan each goal backward
Instead of asking “Which box is nearest to this goal?”, ask “From which square must the box enter the goal?” Then ask where the player must stand for that final push. Work backward one more step: can the box reach the approach square, and can the player reach the required side at that moment?
This exposes impossible assignments early. A lane goal needs a box that can approach along the lane; a pocket goal may require entry from one specific side. If you cannot name the final direction, do not commit a nearby box.
4. Choose box order, not just goal order
When several boxes share a corridor, the order matters. Deep goals normally need attention before shallow goals because a shallow box can stop the deeper box from passing. Likewise, a box that must cross the player’s main workspace may need to move before a box that can stay safely out of the way.
| Board situation | Usually consider first | Why |
|---|---|---|
| Several goals in one narrow lane | The deepest goal | It preserves room for the remaining boxes to pass. |
| A box blocks the only route around the room | The route-opening push | Player access is a prerequisite for every later plan. |
| A box can enter two different goal lanes | The more restricted assignment | A flexible box can often serve the easier lane later. |
| A goal is next to the main workspace | Delay it if it seals access | A solved box is still an obstacle when placed too early. |
5. Keep one workspace square open
The player needs room to walk around boxes and change pushing sides. A small open square can be more valuable than a nearby goal because it lets you reposition for the next push. If every square around a box is occupied, the puzzle may be lost even when all boxes are close to their goals.
Prefer a push that keeps the center open. Do not park a box in the only turning space unless the next push uses it immediately; a longer route can be safer.
6. Separate walking decisions from push decisions
Before touching a box, check that the player can reach the pushing square. After the push, check that the player can still reach the next useful side. This two-part test is more reliable than looking only at the destination square.
Think in three states: player access, box destination, and new player access. If one fails, the push is not ready.
7. Treat one-tile corridors as commitments
A one-tile corridor removes the ability to pass around a box. A box pushed into it may be useful, but the move should be treated as a commitment rather than casual movement. Check whether the box is traveling toward a goal, whether another box must use the corridor first, and whether the player can exit after the push.
With multiple corridor goals, solve the far end first when possible. Filling the near end can block the remaining route; use side pockets as parking spots only when they are goals.
8. Do not solve the nearest goal automatically
Distance misleads; check entry direction and future access first.
9. Plan box order before chasing move counts
Fewest moves is a useful optimization goal only after the puzzle is stable. First find a no-deadlock solution. Then remove waste: unnecessary walking, repeated repositioning, and pushes that temporarily undo another push. A safe solution with a restart is usually better practice than a clever line that fails after one small mistake.
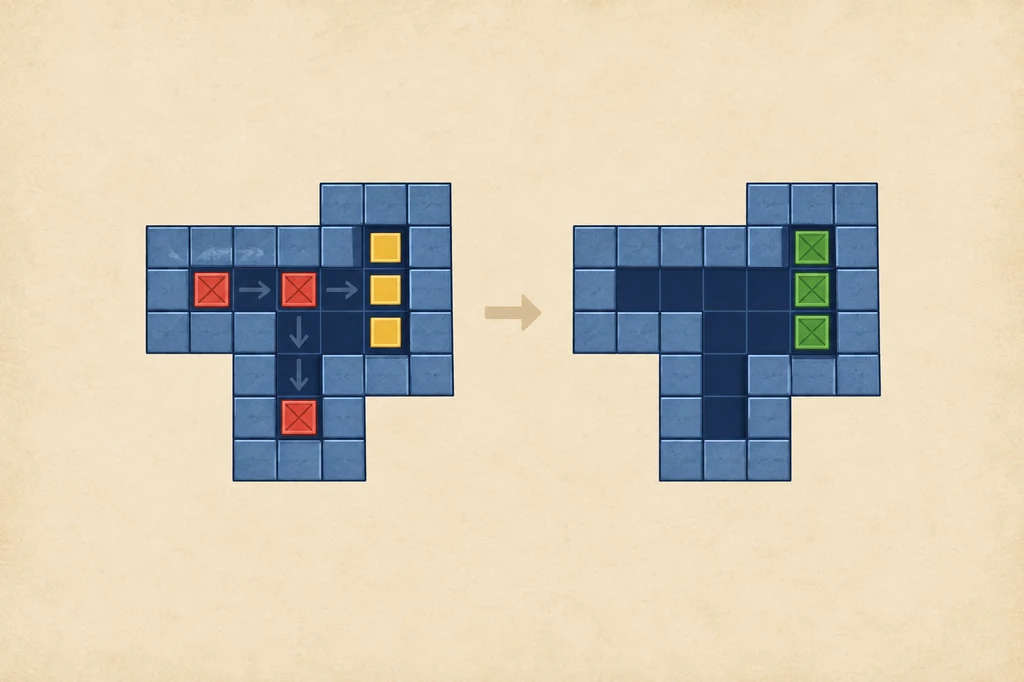
Box order is a route decision: a deep goal or restricted lane often needs to be handled before an easy-looking goal.
10. Inspect the board after every push
Re-read the board after each push: walking routes, workspace, and box assignments may have changed. A pause after an irreversible move is faster than an uninformed restart.
11. Practice on small boards
Small boards make consequences visible. Explain why a box is safe, then compare a direct route with one that preserves workspace. Learn the pattern, not one memorized solution.
12. Use a solver as a check, not as your first thought
A solver can show that a small board is solvable and can help you compare a human solution with a shorter route. It is most useful after you have formed a plan: use the result to inspect a missed assignment, a deadlock, or an unnecessary push. For a small text board, you can try the Sokoban solver online; for hands-on practice, use the browser version of Zeek.
A repeatable solve routine
When a board looks complicated, use this short checklist:
- Map the commitments. Mark non-goal corners, wall traps, one-tile lanes, and the squares where the player must stand to push.
- Map the goals backward. Note each goal’s final entry direction and the box routes that can reach it.
- Pick the restricted assignment. Reserve the right box for the goal or lane with the fewest alternatives.
- Protect access. Keep one turning area open and confirm the player can reach the next pushing side.
- Push, pause, reassess. After every commitment, compare the new board with the original plan before taking another push.
Aim for explainable decisions, not perfect play on every board.
Using this Sokoban strategy in Zeek the Geek
Zeek is not a strict copy of every Sokoban rule, but its compact rooms and object interactions reward the same mindset. Read the Sokoban rules and deadlock guide first if you want the vocabulary, then use the Sokoban levels guide to practice reading board structure. Zeek-specific object combinations can add extra consequences, so keep the player’s route and the remaining workspace visible before you push.
The Zeek walkthrough shows early Part One levels, while the hardest-level guide focuses on difficult layouts. This page explains the habits behind both without replacing level-by-level solutions.
FAQ
What is the best first Sokoban strategy?
Read the whole board before pushing, identify dead squares, and plan the final entry direction for each goal before choosing a box. This prevents the nearest-box mistake.
How do you avoid deadlocks in Sokoban?
Do not push a box into a non-goal corner, seal a one-tile corridor too early, or block the only square where the player can get behind another box. Recheck player access after each push.
Should you put a box on a goal immediately?
Not always. A box on a goal is useful only when it does not block a corridor, workspace square, or the approach needed by another box. A solved box can still be an obstacle.
Can Sokoban strategy help you use fewer moves?
Yes, but preventing restarts comes first. Once you have a stable solution, remove unnecessary walking, repeated repositioning, and pushes that temporarily undo another push.
Does this strategy work for Zeek the Geek?
Yes. Zeek uses compact object-and-route puzzles, so goal order, safe workspace, and careful pushes transfer well even when a level adds extra objects or hazards.
Summary
The strongest Sokoban strategy is a habit of protecting future choices. Mark dead squares, plan goals backward, assign boxes by constraint rather than distance, keep a workspace square open, and pause after every irreversible push. When a board still feels unclear, practice on a smaller level or compare your plan with the online solver instead of guessing.
Reference notes
For terminology on dead squares and solver planning, see the Sokoban Wiki deadlocks reference and this basic Sokoban solver explanation.
Play a board and test the plan
Start with a compact puzzle, make your first push only after checking the route, and use the strategy checklist when a box seems close to a goal.
Play Zeek online Try the solver